Holger Czukay Papertoy
These are the instructions for building my Holger Czukay papertoy.
Download here
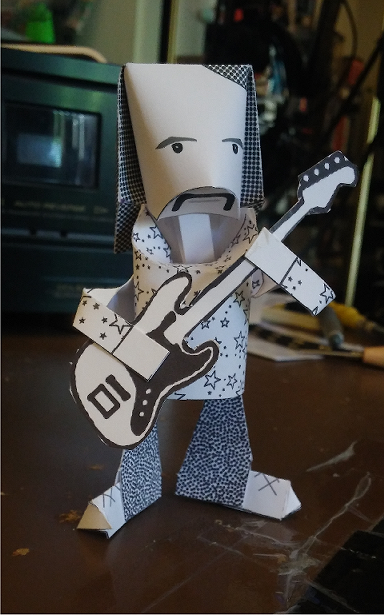
When completed, you should be in proud possession of a figure thusly:
Construction is not especially difficult, but there are a few things to note.
Please take the time to watch the video all the way through before starting construction. And please read this whole page before starting construction.
The video is about 20 minutes long, which is longer than I would have preferred but I cut out as much as I could without skipping steps.
YouTube pro tip: If you click on the video’s gear icon (“settings”) there’s a speed option that will allow you to change the playback speed.
The video will show in what order to assemble that parts, and where to cut and fold.
Glue gets applied to the shaded areas on the pieces. I think it’s pretty obvious where, but the video should help make it clear.
Please try to use the best tools you can. The most costly item would be the cutting blade. I happen to use an X-Acto brand knife but the brand isn’t important. What matters most is that it is sturdy and that you use a sharp blade. A sharp blade will require less pressure when cutting, making it less likely to slip.
A good metal ruler with a cork backing is very handy.
It helps to have something to make creases in the paper before folding. I use a sort of awl, which is a bit sharp. The sharpness seems to work OK on stiffer paper, slightly scoring the paper. A bent paper clip might work as well.
Standard paper glue should be fine. I like using a glue stick. Far less messy than the squeeze bottles.
Be careful. Work slow. Have good lighting.
Give things a some time to dry at each step before moving on to the next step.
After watching the video please finish reading this page for some additional comments.
Note: Some details might be different in the video than on the sheet you received, as some design details were in-progress.
*If you run into any problems or have questions, hit me up on Twitter: @jamesbritt *
Stuff
I’ve constructed this toy about a million thousand times as I worked through the design. One place that seemed finicky was the placement of the head. The video shows the use of a folded strip of paper to serve as a neck, glued to the back inside of the head. It usually works quite well.
However, if you are not happy with the results you might want to experiment with this. Here is an alternative.
From the left-over cardstock (which I trust you have not yet trashed, and if you did it’s in the recycling bin so you can go get it back) cut out a piece 12 cm long and 1 cm wide.
Basically, grab a strip from one of the edges of the printed sheet.

Make an oblong loop, with the ends glued at about 1 cm.
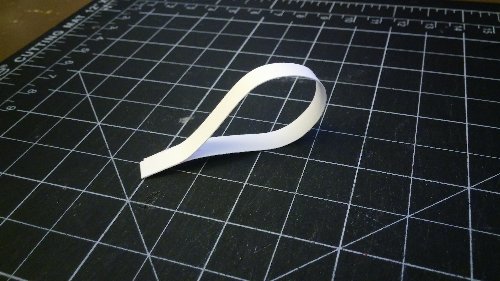
Stick the loop part into the head. The glued ends will form a “neck” of sorts.
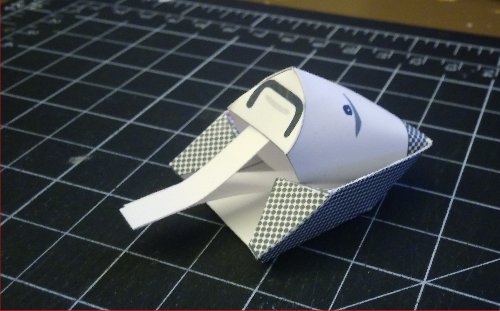
Insert the head/neck into the torso neck hole, and adjust to get a head placement you like.
It helps to fiddle with the hair (pressing it back/in, for example) to help settle the head placement.
.